Checkpoint
Know what was checked, when it was checked and what needs attention.
Flowtig Checkpoint helps organisations manage recurring inspections of physical locations, equipment and other control points.
Whether you're checking fire extinguishers, bait stations, technical equipment, server rooms or safety installations, Checkpoint keeps every inspection organised and documented.
Instead of relying on paper checklists, spreadsheets or memory, Checkpoint creates a clear inspection history and shows which checks are due next.
Recurring inspections made simple
Create checkpoints, define inspection intervals and document every inspection directly where it happens.
Why use Checkpoint?
Many organisations have things that need to be checked regularly.
Over time, keeping track of these inspections can become surprisingly difficult.
Typical questions include:
- Which checkpoints are due for inspection?
- When was this checkpoint last inspected?
- Who performed the inspection?
- Was everything in order?
- Were any issues discovered?
- Is there photographic documentation?
Checkpoint provides one central place to answer these questions.
Overview
With Checkpoint you can:
- Organise checkpoints into inspection objects
- Define individual inspection intervals
- Store checkpoint locations
- Track upcoming and overdue inspections
- Record inspection results
- Add notes and photographs
- Generate QR codes for checkpoints
- Start inspections directly by scanning a QR code
- Review the complete inspection history
Inspection Objects
Checkpoints are organised into inspection objects.
An inspection object represents the place, customer, building or other context containing one or more checkpoints.
Typical examples include:
Customer Site
 ├── Fire Extinguisher – Entrance
 ├── Fire Extinguisher – Warehouse
 └── Emergency Exit – Rear Door
or:
Building A
 ├── Server Room
 ├── Electrical Cabinet
 └── Heating System
Inspection objects can also be associated with contacts from Flowtig Contacts.
Checkpoints
A checkpoint represents the individual item or location that needs to be inspected.
Every checkpoint can contain information such as:
- Name
- Description
- Inspection interval
- Geographic location
- Inspection history
- QR code
Each checkpoint can have its own inspection interval, allowing different inspection schedules within the same inspection object.
Inspection Intervals
Not every checkpoint needs to be inspected at the same frequency.
Checkpoint allows an individual inspection interval to be configured for every checkpoint.
Typical examples include:
- Every 7 days
- Every 30 days
- Every 90 days
- Once per year
Based on the last completed inspection, Checkpoint automatically determines when the next inspection is due.
Tip
Checkpoints that have never been inspected are immediately considered due, making newly created checkpoints easy to identify.
Inspections
An inspection records what happened when a checkpoint was checked.
Every inspection automatically records important information including:
- Checkpoint
- Start time
- Completion time
- Inspecting person
- Result
- Notes
- Photographs and attachments
This creates a permanent history for every checkpoint.
Inspection Results
Inspection results are deliberately simple.
Each completed inspection can be classified as:
| Result | Meaning |
|---|---|
| OK | Everything is in order |
| Warning | An issue or irregularity was noticed |
| Failed | The checkpoint is not in an acceptable condition |
This makes it easy to identify checkpoints requiring attention without creating unnecessarily complicated inspection forms.
Notes & Photos
Sometimes an inspection result alone is not enough.
Checkpoint allows additional information to be documented directly during the inspection.
Typical examples include:
- Damage
- Unusual conditions
- Maintenance requirements
- Missing equipment
- Corrective actions
Photographs can be attached to provide visual documentation of the condition at the time of inspection.
Document what you see
Photos and notes provide valuable context when reviewing inspections later.
QR Codes
Every checkpoint can have its own QR code.
QR codes can be printed and attached directly to the physical checkpoint.
Scanning the code opens the corresponding checkpoint and allows a new inspection to be started immediately.
Typical workflow:
Arrive at Checkpoint
        │
        ▼
Scan QR Code
        │
        ▼
Start Inspection
        │
        ▼
Record Result
        │
        ▼
Add Notes & Photos
        │
        ▼
Complete Inspection
This makes recurring inspections particularly convenient on smartphones.
Mobile Inspections
Checkpoint is designed to be used where inspections actually happen.
The mobile inspection workflow focuses on the information required during an inspection:
- Inspection result
- Notes
- Photos
- Completion
QR codes can be scanned using Checkpoint's integrated scanner or with the smartphone's regular camera.
Tip
Place QR codes directly at the physical checkpoint to make inspections faster and reduce the chance of selecting the wrong checkpoint.
Locations & Map
Checkpoints can optionally include geographic coordinates.
This allows physical checkpoints to be displayed on a map and makes it easier to understand where inspections need to take place.
Location information is particularly useful when checkpoints are distributed across:
- Large properties
- Construction sites
- Industrial facilities
- Multiple buildings
- Outdoor areas
Dashboard
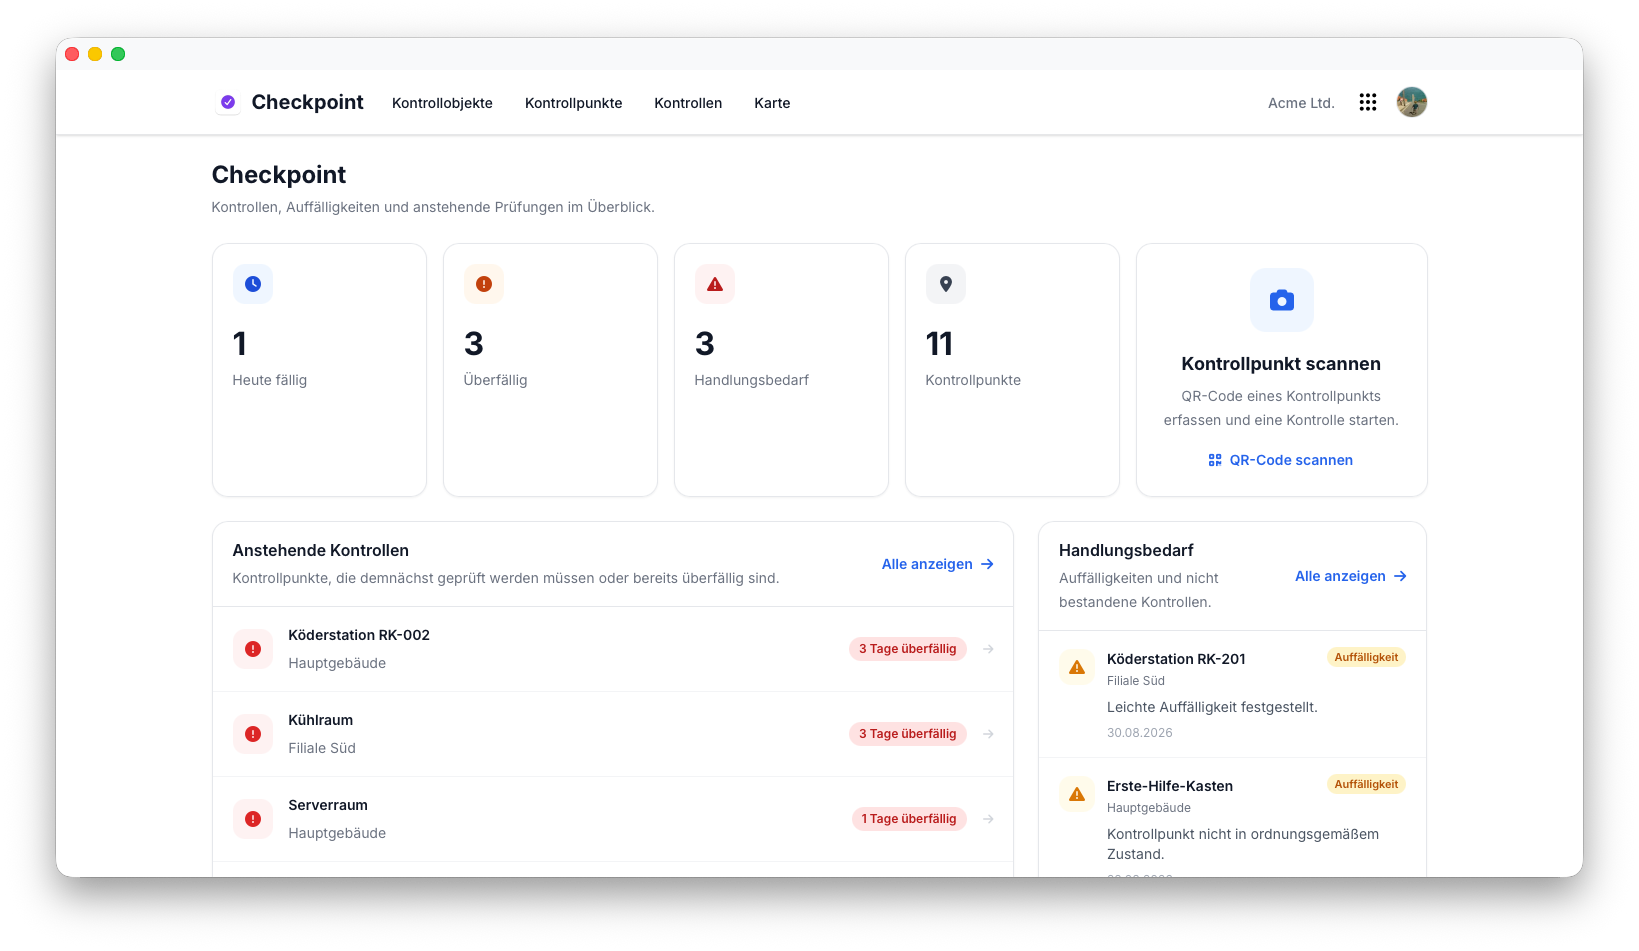
The Checkpoint dashboard provides an overview of the current inspection situation.
It highlights information such as:
- Active checkpoints
- Upcoming inspections
- Overdue inspections
- Checkpoints requiring attention
- Recent inspection results
Instead of checking every checkpoint individually, the dashboard helps identify where action is required.
Inspection History
Every completed inspection remains part of the checkpoint's history.
This makes it possible to answer questions such as:
- When was the checkpoint last inspected?
- Who performed the inspection?
- What was the result?
- Were problems already present during an earlier inspection?
- Which photos were taken?
A history for every checkpoint
Each inspection adds another entry to the permanent documentation of the checkpoint.
Permissions
Checkpoint uses Flowtig's central permission system.
Typical permissions include:
| Permission | Description |
|---|---|
| View checkpoints | Browse inspection objects and checkpoints |
| Create checkpoints | Add new checkpoints |
| Edit checkpoints | Modify checkpoint configuration |
| Delete checkpoints | Remove checkpoints |
| Perform inspections | Record inspections |
| View inspections | Review inspection history |
Permissions can be assigned independently, allowing organisations to control who manages checkpoints and who performs inspections.
Best Practices
Recommendation
Define inspection intervals when creating checkpoints so due inspections can be calculated automatically.
Tip
Attach QR codes directly to physical checkpoints whenever possible.
Tip
Add photographs when documenting issues or irregularities. They make later reviews significantly easier.
Note
Deactivate checkpoints that are temporarily no longer in use instead of deleting them. This preserves their inspection history.
Frequently Asked Questions
What can I inspect with Checkpoint?
Almost anything that needs to be checked repeatedly.
Typical examples include fire extinguishers, technical equipment, bait stations, safety installations, rooms, machines and outdoor facilities.
Can every checkpoint have its own inspection interval?
Yes.
Each checkpoint has an individual inspection interval, allowing different inspection schedules within the same inspection object.
Can I see which inspections are overdue?
Yes.
Checkpoint calculates upcoming and overdue inspections based on the configured interval and the last completed inspection.
Can photographs be attached to inspections?
Yes.
Photos and other supporting files can be added directly to an inspection.
Can inspections be started using QR codes?
Yes.
Every checkpoint can have its own QR code. Scanning it opens the checkpoint and allows an inspection to be started.
Do I need a special QR code scanner?
No.
You can use Checkpoint's integrated scanner or scan the QR code using the regular camera on a compatible smartphone.
Can checkpoints be displayed on a map?
Yes.
Checkpoints with geographic coordinates can be displayed geographically, making distributed inspection points easier to locate.
Is the previous inspection history preserved?
Yes.
Completed inspections remain associated with their checkpoint and provide a chronological history of previous results, notes and documentation.
Typical Workflow
Create Inspection Object
          │
          ▼
Add Checkpoints
          │
          ▼
Define Inspection Intervals
          │
          ▼
Generate & Attach QR Codes
          │
          ▼
Perform Regular Inspections
          │
          ▼
Document Results & Issues
          │
          ▼
Review Due Inspections
See also
Checkpoint works particularly well together with:
- Contacts — Associate inspection objects with customers and organisations
- Calendar — Keep track of scheduled activities
- Transfer — Share additional documentation
Need help?
Need assistance with Checkpoint?
Learn more on the Flowtig website or contact our support team:
- https://flowtig.com/apps/checkpoint
- https://flowtig.com/contact